


Views: 0 Author: Site Editor Publish Time: 2026-08-12 Origin: Site


Improper assembly of a pet enclosure directly compromises its structural integrity. Loose panels or misaligned hinges often lead to pet escapes, accidental injuries, or premature wear on the joints. You need a secure setup. This requires methodical alignment from the very start. It does not matter whether you evaluate a standard wire folding crate or deploy a commercial-grade containment system. Precision matters for your peace of mind and your dog's safety.
If an enclosure rattles due to poor construction, the noise often creates anxiety in pets. A solid, silent structure fosters a calm environment. In this guide, we provide a verified, step-by-step methodology. You will learn how to assemble these structures safely and efficiently. We cover environment preparation, structural evaluation, and practical assembly steps. Following this process minimizes setup time while maximizing long-term reliability.
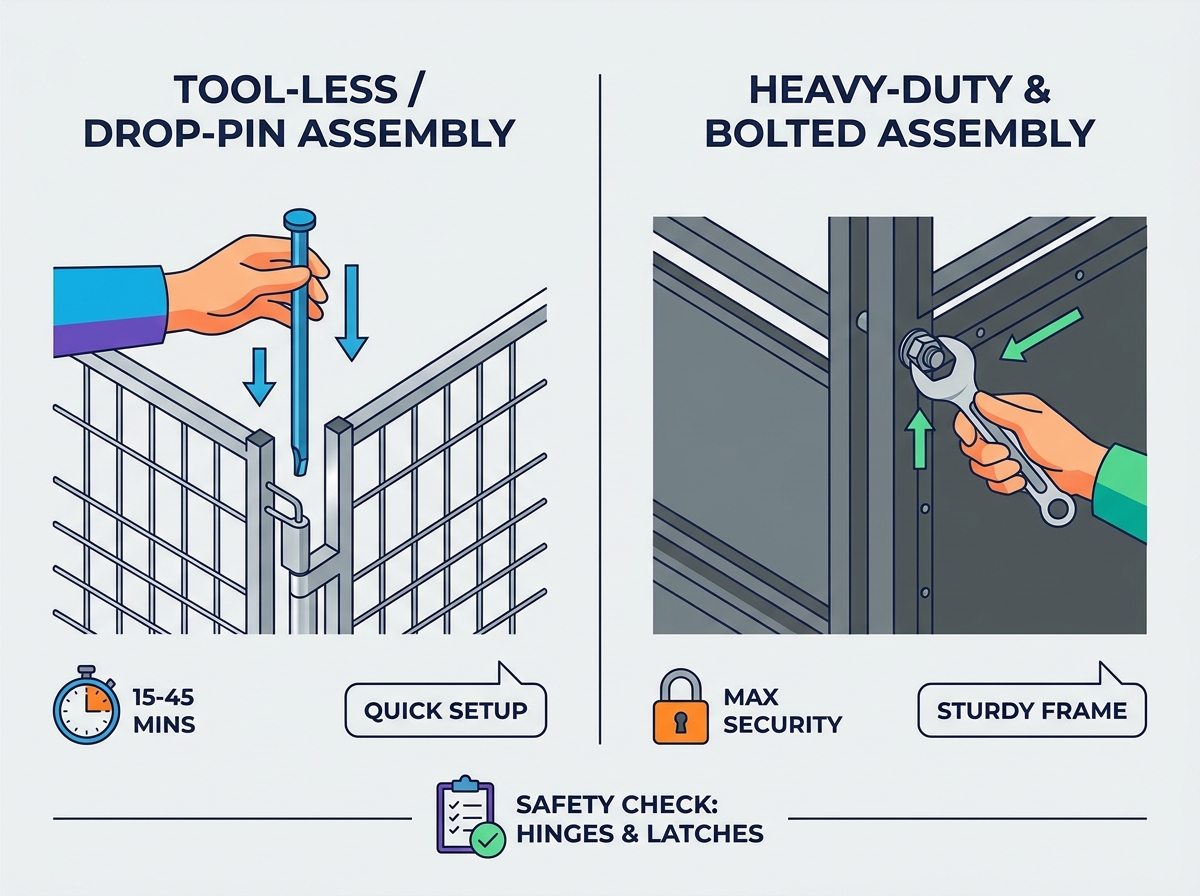
Standard assembly generally takes 15 to 45 minutes, depending on whether the unit uses a tool-less drop-pin design or requires bolted joints.
Sorting components and identifying the primary load-bearing panels before connecting any joints prevents mid-assembly tear-downs.
Routine safety checks—specifically inspecting hinge alignment and latch engagement—are mandatory steps before introducing a dog to the enclosure.
Material selection impacts handling during setup; a stainless steel dog cage requires careful placement to avoid floor scratching, while an aluminum dog cage offers easier solo assembly due to its lighter weight.
You must evaluate the final footprint first. We recommend assembling the structure near its permanent location. Dragging heavy components across a room strains the partially built frame. Hardwood, vinyl, and tile floors scratch easily during this process. Lay down protective mats or temporary rubberized flooring. This prevents surface damage and dampens noise while you work.
Next, tackle the component inventory using a strict shortlisting logic. Unbox everything and lay it flat. Cross-reference all unboxed parts against the manufacturer’s manual. Group them by type. Place side panels together. Group the roof and floor grates separately. Keep drop-pins, brackets, and latches in distinct, visible trays. You must identify missing or warped parts immediately before beginning construction. Finding a missing bracket halfway through the build wastes time and introduces implementation risks.
Assess your tool requirements based on the specific design. Many modern folding units feature tool-less assembly. They rely entirely on interlocking panels and your hands. Other heavy-duty models require precise mechanical fastening. Gather a rubber mallet, hex keys, and protective gloves. Never use power drills to tighten bolts on a metal dog kennel. Power tools easily over-torque bolts. Over-torquing strips the metal threads and weakens the primary structural joints.
Common Assembly Preparation Mistakes:
Building the unit in a tight hallway, leaving no room to attach the side panels.
Leaving small hardware loose on the floor where they easily roll away or become lost.
Using a metal hammer instead of a rubber mallet, which dents the protective rust-proof coating.
Different designs require different assembly logic. You must contrast the assembly methodology based on your specific unit type. Recognizing these structural differences prevents critical errors during the initial alignment phase.
Tool-less or drop-pin models rely heavily on gravity and precision alignment. You align the interlocking wire edges first. Then, you drop the long metal pins through the aligned loops. Gravity keeps these pins secure. This design distributes shear forces evenly across the vertical corners. It allows for a very fast, intuitive setup.
Heavy-duty and bolted models demand a more rigid approach. These enclosures require staggered bolt tightening. You must secure all corners loosely at first. Once the entire frame stands, you tighten the bolts in a diagonal, alternating pattern. This staggered approach ensures perfect frame squareness. If you fully tighten one side first, the opposite side will warp, making door alignment impossible.
Consider scalability and expansion when evaluating your space. A modular dog crate allows for custom configurations. You can adapt the shape to fit unusual room layouts. You can also plan for future expansions. Adding compatible extension panels gives a growing dog more space without requiring an entirely new purchase.
Material nuances strongly dictate the physical effort required. Weight changes the whole assembly process. Think about the heavy lifting required for a commercial-grade stainless steel dog cage. You usually need two people to align the heavy, rigid panels safely. In contrast, an aluminum dog cage offers a much more agile setup. Its lighter weight allows for easy, safe solo assembly while still providing excellent resistance to chewing.
Follow these exact steps to ensure a safe build. Rushing through the panel alignment often causes irreversible warping.
Anchor the back panel to the primary floor grate or base frame first. This forms your foundational T-shape or L-shape structure. Ensure the connection points remain slightly loose. Do not fully tighten the hinges, clips, or bolts yet. You must allow for slight spatial adjustments as you introduce the remaining sides. If the base pan slides out for cleaning, verify the track faces the correct direction before moving forward.
Align the side panels at exactly 90-degree angles to the back piece. Slide the vertical connections into place. Pay attention to the implementation reality. We strongly warn against forcing misaligned pins. Sometimes, hinges do not seat naturally. If you feel resistance, stop immediately. The ground may be uneven, causing the frame to twist. Alternatively, you might have installed the base panel backward. Recheck your floor level. A simple manual adjustment usually fixes the alignment issue.
Position the front panel carefully. Ensure the door swings outward, or ensure it matches the intended room flow. You do not want the door hitting a nearby wall or blocking a walkway. Secure the primary upper and lower corners. For drop-pin systems, thread the long rods through all intersecting loops. Push them straight down from top to bottom. Ensure they seat fully into the bottom locking rings.
If your unit includes a top enclosure, install the roof last. Place the roof panel squarely over the top edges of the assembled walls. Fasten all roof clips or bolts simultaneously. Work your way around the perimeter evenly. This strategy distributes tension equally across the entire upper frame. It prevents the cage from twisting under its own weight.
Do not skip your final security checks. A fully built enclosure is not ready for an animal until you verify its integrity. Dogs apply surprising amounts of localized pressure against doors and corners. The structure must withstand this force.
First, perform the Latch Test. Evaluate all locking mechanisms on the main door and feeding doors. Test the slide-bolt, slam-latch, or carabiner clips. Open and close them several times. Confirm smooth operation without any metal-on-metal friction. A sticky latch might fail to engage fully when a dog pushes against it from the inside.
Next, conduct a Pinch-Point Inspection. Put on a pair of thick protective gloves. Physically run your hands over all joints, hinges, and weld points. Check for sharp metal burrs left over from the manufacturing process. Look closely for uneven gaps. Paws, claws, or collars easily get caught in expanding gaps. Eliminate these hazards immediately. You can file down minor metal burrs using a standard metal file.
Finally, execute the Shake Test. Apply moderate lateral pressure to the assembled frame. Push it gently from the side and the front. The structure should exhibit minimal flex. You should hear zero rattling at the connection points. Rattling noises indicate loose bolts or unseated drop-pins. Tighten any loose connections until the frame stands completely silent under pressure.
Test Type | Inspection Focus | Success Criteria |
|---|---|---|
Latch Test | Door locks, slide-bolts, slam-latches | Smooth sliding action; secure locking without friction. |
Pinch-Point Inspection | Hinges, weld points, corner gaps | No sharp burrs; gaps remain too small for paws or collars. |
Shake Test | Overall frame stability, drop-pins, bolts | Minimal structural flex; zero rattling noises under lateral pressure. |
Eventually, you may need to move or store the unit. You must follow a strict disassembly protocol to prevent damage. Outline the reverse-engineering steps clearly. Break down the structure without stressing the metal joints. Remove the roof panel first. Take off the front door panel next. Then detach the side panels. Finally, unclip the back wall from the base grate. Pack all components flat. Keep all small hardware in a sealed, labeled bag taped to the base pan.
Corrosion prevention is vital for long-term use. This applies especially for units placed in high-humidity areas, basements, or outdoor patios. Implement routine maintenance criteria. Lubricate the door hinges every few months using a pet-safe, food-grade silicone spray. Wipe down all wire components regularly. This prevents rust, even on powder-coated materials. Dog urine contains uric acid. This acid quickly eats through protective coatings if left uncleaned. Prompt, thorough cleaning adds years to the product's lifespan.
Move on to your next-step actions. Do not put your dog onto bare wire grates immediately. Integrate comfortable, supportive kennel liners. Add heavy-duty, chew-resistant bedding. Install spill-proof water and food bowls on the lower crossbars. Complete all these interior setups before initiating any formal kennel training. The environment must look and feel safe, comfortable, and welcoming.
Meticulous assembly correlates directly with the ultimate safety of your pet. Taking the time to build the structure correctly protects your animal from avoidable harm. Methodical preparation guarantees a quiet, sturdy enclosure.
Skipping steps compromises your investment. Forcing misaligned pins or ignoring uneven gaps leads to rapid structural wear. It also creates dangerous vulnerabilities where a persistent dog might break out.
You have now verified the structure completely. The latches are secure, and the frame remains solid under pressure. Direct your attention to the manufacturer’s specific warranty terms. File your manual and purchase receipt in a safe place. You are now fully prepared to introduce your dog to their secure new space.
A: A standard wire folding crate takes roughly 15 minutes to assemble. Heavy-duty bolted models typically require 30 to 45 minutes. Tool-less drop-pin designs fall in the middle, usually taking about 20 minutes once you unbox all components.
A: It depends on the material. You can usually assemble a lightweight aluminum model alone. However, we strongly recommend two-person lifting for large steel models. Commercial steel panels are incredibly heavy and require a second person to stabilize them during alignment.
A: Never use a hammer to force them. Stop and loosen the adjacent panels. Check the floor beneath the base to ensure it is completely level. An uneven floor twists the frame. Adjusting the base or adding a leveling shim usually corrects the pin alignment instantly.
A: Yes. High-quality modular designs use heavy-duty brackets and reinforced drop-pins. These connections create a rigid structural integrity. When assembled correctly, they equal or exceed the security and stability of standard single-piece folding wire models.


